Voltaic the Age of Energy was an Element Age written by Atrus, based on the concept that "Energy Powers Future Motion".
Its purpose was to teach his sons, Sirrus and Achenar, one of the first steps of the Art. Rich in natural energies, this Age embodies raw energy (water and lava) that is converted into useful forms (hydroelectricity, electromagnetism and pressurized hot air) channeled by power flow. The whole complex is connected with a circuit with unconnected breaks. The lesson consisted of harnessing, transforming and channeling their forms to activate a series of mechanisms and complete the circuit in order to get power flowing to the Small Isle.[1]
Geography[]
Like most of Atrus's known Ages, Voltaic is an uninhabited island, a rock of sandstone cliffs[1] carved by a U-shaped gorge. To the NW of the island there is an ocean inlet that spills water down the canyon; an hydroelectric power plant spans the length of the waterfall.
A catwalk connects the Small Isle with the main island across the water, following a crevasse through the cliff wall of the main island. The crevasse leads to the Chasm but also intersects to a narrow, red-lit tunnel to the south ending up to a door leading to the Lava Room, while branching to a narrow, blue-lit tunnel that leads to the Power Plant.
Movement around the island is possible with suspended catwalks and walkways, bridges and ladders. Most structures seem to be suspended from other structures and wires protruding from the rock walls.
Points of Interest[]
- Small Isle
The entry island, now floating.
One of the three symbols used to access Narayan - "Future Motion".
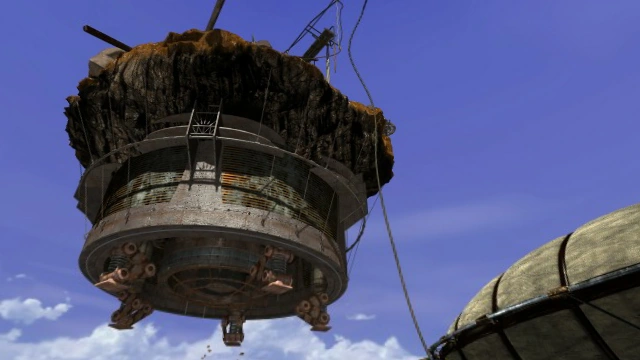
A tiny islet sitting at the mouth of the inlet. It is the link-in point to the Age, and a round stone building stands on it. metallic container protects a linking book to the Energy Tusk of J'nanin should the learners wish to return before having finished the trial. The building is connected with a thick electrical cable which runs through a metal pole and protrudes from the water. Initially it is unpowered and its metallic security door won't open, but behind it, there is a small stone room with a ladder down a long shaft. Another metal door covers the Electromagnet Chamber below.
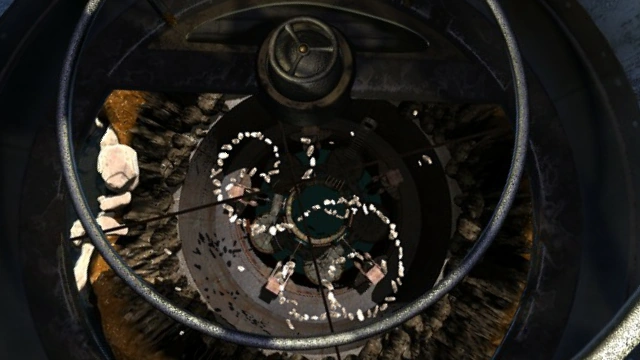
AWhen the Isle is powered with electricity through the circuit, the magnetic force of the two powerful electromagnets repel each other in the chamber beneath, causing the building to break free of the ground and levitate. Shards of rock and dirt captured by the force between the two magnets form a floating spiral, which from above forms the Energy symbol. A cabinet holds another J'nanin linking book, linking into the second floor of the Observatory.
- Inlet Gantry and Pylons
Two metal pylons and a stone gantry tower rise from the inlet water. A cable runs from the Power Plant to a pole on one of the pylons, whereas a cable from the second pylon ends to the Small Isle. The circuit is broken between the pylons however, and the system relies on the airship from the Dry Dock to make the connection. The inlet gantry has a lever which controls a brake that holds the gantry platform, preventing the airship from the Gorge from moving forward.
Once released, it allows the airship to move, pushing the gantry platform with its weight. At the same time, the mechanism that holds the airship onto the cables lifts and drags the pole to touch on the second pylon, connecting the pylons, and electricity flows from the Power Plant to the Small Isle.
- Power Plant
The active power plant.
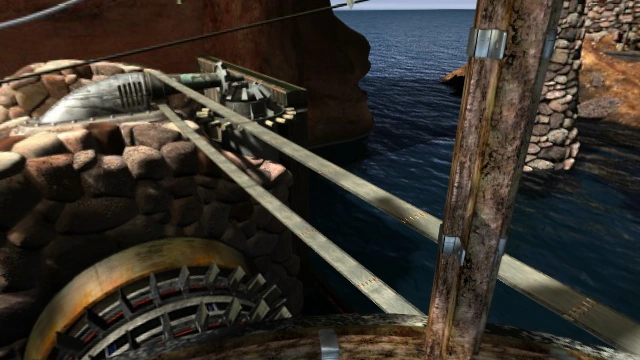
A hydroelectric power plant built across the waterfall. The inlet rocks split the falls into two spillways: one that runs under the waterwheel, and another under the gear platform. A movable sluice gate directs water into only one of the spillways. The whole system converts the waterfall's kinetic energy into electricity (through a turbine generator) to feed the electromagnet chamber and other mechanisms around the island. It has three sections...
- Control Tower
- One can reach it following blue-lit tunnel from outside. At the lower level there is a diagram representing with icons several mechanisms (the Waterwheel, the Electromagnet Chamber, the Small Isle, the Chasm Elevator and the Lower Magnet), and whether they are powered up. The top of the tower gives a view to the Small Isle, the Gantry and Pylons and the sluice gate. A control panel controls the sluice gate and whether it powers the Waterwheel or the Gear Platform. A left wheel (sabotaged by Saavedro) controled the Waterwheel vanes.
- Waterwheel

The waterwheel which powers the island.
- A long cylindrical wheel, or tube, stretching from the control tower to the gear platform; a metallic corridor runs inside its length connecting the two locations. Along its diameter there are several rows of movable vanes, which cause the wheel to turn (provided that they are deployed and water is running underneath). A huge gear is attached vertically to the end of the waterwheel and can be engaged to the other gear of the Gear Platform.
- Gear Platform
- It has a massive horizontal gear which, when engaged to the huge gear of the waterwheel, it powers the turbine generator, the island's source of electricity. A ladder runs down a shaft to the gear's emergency release mechanism; a gear crank raises the floor gear so that it engages the waterwheel gear. The crank can't be turned while the waterwheel gear is already in motion. The shaft is flooded when the sluice gate diverts water to the Platform. A security door leads to the Electromagnet Chamber. It opens only when powered by the turbine generator.
- Electromagnet Chamber
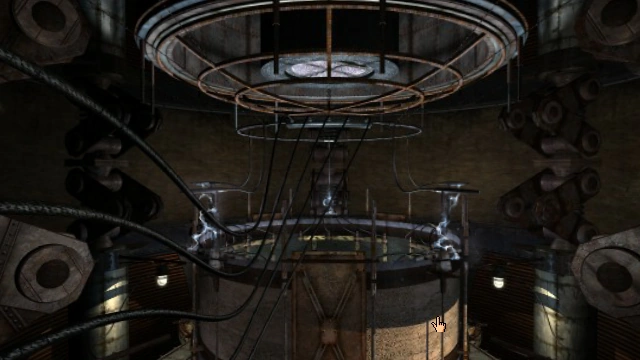
An underground chamber under the Small Isle. It is reached through the Gear Platform's security door and a ladder down a shaft. An antechamber has a kind of viewing screen where Saavedro has recorded a message to Atrus and from there, an underground tunnel leads beneath the Small Isle.
The main chamber has a central electromagnet cylinder (probably the Lower Magnet) surrounded by 5 platforms and electromagnetic coils line its walls. The cylinder is powered by the Waterwheel's turbine generator and distributes power to other locations (such the Chasm Elevator and the Small Isle). It houses a vast electrical circuit array ringed along the interior walls. Apertures in the cylinder, numbered in D'ni counterclockwise, show segments of the 3 movable strips of circuits, allowing to align their connectors. When it operates, electricity arcs from the central circuit to the coils.
When the Isle is powered with electricity, the magnetic forces of the Lower Magnet with the another one's above, repel each other, pushing the building to break free of the ground and levitate.
- Gorge
The canyon winding twists and turns was carved by a whirlpool; water flows from the inlet's waterfall down through the gorge. It ends up to a large circular Chasm. A series of tall metal pylons, attached to the gorge, supporting a thick power cable which runs from the Power Plant to the airship in the Chasm.
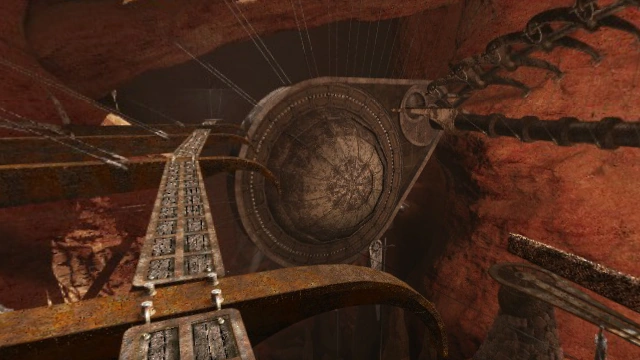
- The Chasm
A large circular canyon to the NE of the island; a narrow Gorge branches off to the south ending up to the ocean while a cave to the east, serves as a Dry Dock. The cable coming from the Gorge makes a 90-degree loop around the stone gantry tower, and goes behind the circular Dry Dock door.
- Elevator and Gantry
- A corkscrew elevator connects the Chasm's upper and lower walkways. It operates only if the Electromagnet Chamber does (ant therefore the Power Plant as well). At the end of the gantry platform is the release lever of the dry dock door high above. When the airship is released, it floats along the cable, pushes the gantry platform's walkway, and comes to a halt.
- Hot Air Conduit
- A segmented pipe suspended by a spine-like structure, prominently traverses the Chasm. It transfers hot air from the Lava Chamber to the Valve Tower. Then it splits into three sets of valves that supply pressure to the airship balloon.
- Dry Dock

The pathway leading behind the main gondola gate below.

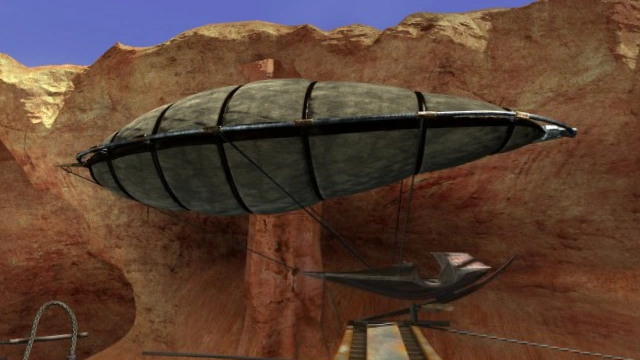
The Gondola
A massive cave carved into the east side of the Chasm, serving as the dry dock for the airship, a hot-air balloon with a gondola. The airship is initially deflated and is kept behind a massive circular segmented dome-like door. A catwalk connected the Valve Tower with the airship but Saavedro destroyed this access. A pipe directs hot air from the valve system to the balloon.
- Valve Tower
- Situated adjacent to the Dry Dock door, it receives the hot air conduit and splits it into 3 sets of valves that control and supply pressure for inflating the airship. Each valve releases a set amount of pressure (one of them had been jammed by Saavedro) totalling 60 units. A pneumatic lift fed by the sae air pressure, provides access to the higher tiers; it needs 22 units to reach the middle tier and 49 to reach the top tier. Adjacent to the tower there is the release valve that pumps the pressurized hot air into the pipe that leads to the balloon; it requires 19 units.
- Between the tower and the cave wall there is a maintenance ladder leading to a metal staircase; on the top there is a small platform and a juncture where the hot air conduit feeds into the tower. A dome-shaped maintenance hatch leads to the Hot Air Conduit.
- Lava Chamber
An underground chamber where the blue-lit tunnel leads. Its purpose is to control and provide superheated air from the lava heat, needed to inflate the airship. The chamber has two levels. Each has a control wheel with a red knob which activates the control gear, or moves its hydraulic arm, in the containment room.
The control room has a window overlooking the lava containment center and a shaft with a ladder leads to the bottom level. Above is the grate of a dark ventilation duct leading outside to the Chasm next to the Hot Air Conduit. As initially the door is locked with a latch by Saavedro, this is the way to enter this room for a first time. Saavedro also has wedged in a bolt in the center grove of the control wheel and it's impossible to switch the gear from this room.
Underneath is the lava containment chamber. It has 3 large gates on has two large gates on opposite walls: the left gate lets lava flow in, the right lets lava drain out. A single control gear is movable with a hydraulic arm that slides between the gates; the gear raises or lowers the gates and also simultaneously the catwalk; so that the lava rises as does the catwalk, or the opposite. On its highest level, the catwalk reaches the fan control; a giant intake fan draws the lava's hot air into a conduit and funnels it to the Dry Dock's Valve Tower to inflate the airship. In that room, Saavedro made a mural with his story.
Saavedro's Traces[]

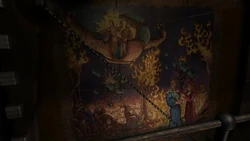
A painting by Saavedro, depicting the brothers crimes against his people.
Saavedro left pages of his journal around the Age and jammed some of the mechanisms...
- The red-lit tunnel has the 1st page.
- He removed the wheel controlling the vanes from the control panel, forcing you to open them manually.
- Locked the Lava Chamber door from inside.
- The Electromagnet Chamber has the 11th page.
- Damaged the original catwalk leading to the airship.
- The platform above the Valve Tower has the 14th page.
- He jammed one valve in the lower tower of the Valve Tower so that it always gives at least 10 units of pressure.[1]
- In the upper level of the Lava Chamber he wedged a bolt in the central groove of the control wheel.[1]
- He drew a mural in the lava containment room depicting the civil strife in Narayan, with the figures of Sirrus and Achenar fleeing with riches while himself and his family are crying.
- The base of the Chasm Elevator has the 8th page.
- He damaged the original symbol of Narayan letters. Now it consists of the letters "motion" and "future".[1]
Notes & Trivia[]

- Voltaic's linking book symbol, following the theme of each age's book symbol representing the final "ride" of their respective age, is a stylized shape of the airship,. The pointer in the dial of the Valve tower has a similar shape. The symbol is also seen in the save screen of the game.